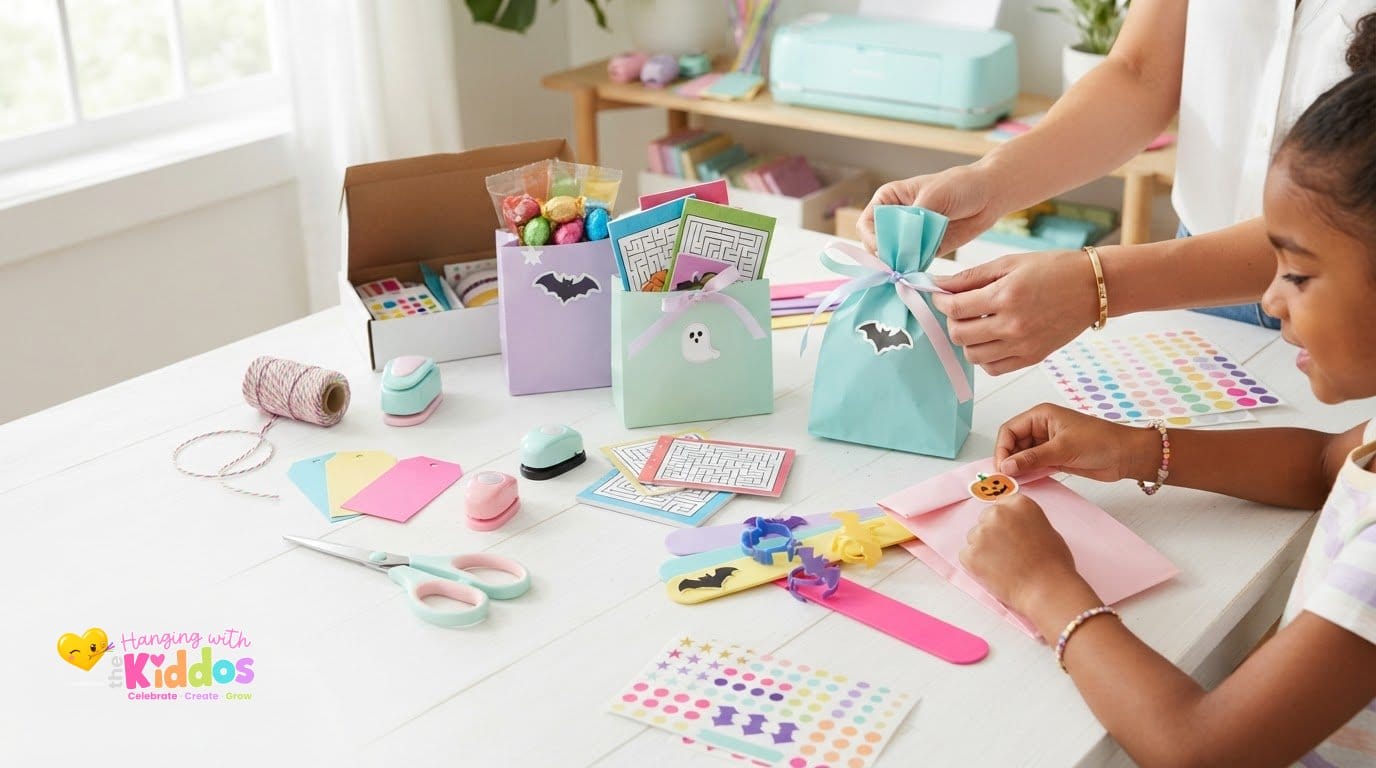
What if your next birthday celebration looked like it was designed by a professional event planner, but actually cost less than a single trip to the big-box party store? We’ve all been there. You want a magical day for your child, but the pressure to create unique DIY birthday party decorations often leads to more stress than inspiration. It’s easy to feel overwhelmed by endless themes while worrying that generic, store-bought decor will look cheap or uninspired. You deserve a celebration that looks as special as the person you’re honoring.
The good news is that you don’t need a massive budget or a professional degree in graphic design to create a stunning, cohesive event. This guide will show you how to master your party planning using simple tools and editable templates that take the guesswork out of the process. We’re breaking down a stress-free roadmap that covers everything from choosing a theme to professional-quality printing. You’ll learn exactly how to stay organized and confident throughout the entire process. Get ready to transform your party vision into a polished reality that will leave your guests wondering how you did it all yourself.
Choosing the Perfect Theme & Setting Your Foundation
Everything starts with our “Celebrate” pillar. This is the heart of every memorable event. Before you browse for DIY birthday party decorations, look at the guest of honor. What makes them light up? Identifying their current passions, whether it’s a specific hobby or a favorite animal, ensures the party feels deeply personal. A great theme isn’t just a label; it’s a reflection of who they are right now. Start there, and the rest of your creative choices will fall into place.
Once you have a spark of an idea, think about how it scales. A professional-looking event flows seamlessly from the initial invitation to the final thank-you note. To avoid the trap of theme overwhelm, don’t try to do everything. Focus your energy on three core visual elements. This might be a specific color palette, a recurring pattern, and one signature graphic. This strategy creates a “branded” feel that looks intentional and polished without requiring you to decorate every single corner of the room.
Trending Birthday Party Themes for 2026
We’re seeing a shift toward immersive experiences. Trends for 2026 lean into highly specific niche interests that tell a story. Consider these popular directions for your next bash:
- Collector’s Corner: Focus on a specific passion by incorporating high-quality vehicle or railway models from Darlington Diecast Models Limited into your theme for a truly unique and detailed celebration.
- Retro-Inspired Celebrations: Bring back the nostalgia with 90s and Y2K vibes. Think bright neon colors, pixel art, and playful patterns that appeal to both kids and adults.
- Nature Explorer: Focus on sustainability with an eco-friendly theme. Use earth tones, natural textures, and activities that encourage guests to engage with the outdoors.
- Tech-Integrated Themes: Blend the physical and digital. Use QR codes on your decor to lead guests to custom playlists, digital scavenger hunts, or shared photo albums.
- Festive Heritage: We are seeing a trend toward celebrations that blend traditional elements with modern design. Coordinating your DIY decor with high-quality festive outfits from Maison Q is a great way to create a polished and culturally resonant 2026 celebration.
The Essential 12-Week Planning Timeline
Great event management is all about the timeline. Breaking your tasks into small steps prevents that last-minute panic. Follow this roadmap to stay on track:
- Weeks 12-8: Define your budget and guest list. Secure your venue or finalize your home layout. This is the time to lock in your “big” idea.
- Weeks 6-4: Start your design work! Select your Editable Canva Party Templates and order your printing supplies. Getting your glossy paper and cardstock early ensures you aren’t waiting on shipping.
- The Final 48 Hours: This window is for execution. Prep your food, assemble your favor bags, and set up your main display areas. Keeping the assembly to these final hours ensures everything looks fresh and crisp for the big day.
The Secret to Professional DIY: Cohesive Party Branding
Think of your party as a mini-brand. Cohesive branding means ensuring every single item, from the chip bags to the water bottle labels, looks like it belongs to the same designer set. This is the ultimate secret to elevating DIY birthday party decorations from “homemade” to “high-end.” When your colors, fonts, and graphics match perfectly, it creates a polished atmosphere that impresses guests the moment they walk through the door. It’s about creating a unified visual story that feels intentional and expensive.
There is a powerful psychological impact to a well-coordinated event. A cohesive look reduces visual clutter, making the environment feel more harmonious and celebratory. It tells your guests that you’ve put thought into every detail, which makes them feel more valued. Using Canva party templates is the fastest way to maintain this consistency. You don’t need to be a designer; you just need the right tools to keep your creative vision on track.
Creating Your Signature Color Palette
Start by locking in your party colors early. If you’re using Canva, leverage their Brand Kit feature to save your specific hex codes. This ensures your blues stay blue and your pinks don’t shift between different printables. To keep things balanced, try the 60-30-10 rule:
- 60% Primary Color: Use this for your largest areas, like tablecloths or backdrop bases.
- 30% Secondary Color: Apply this to your main DIY birthday party decorations, such as banners and favor boxes.
- 10% Accent Color: Choose a vibrant shade that “pops” in photos and stands out on social media for small details like ribbons or text highlights.
Why Personalization Beats Store-Bought Decor
Generic “Happy Birthday” signs from a big-box store are easy, but they lack soul. Personalization is the fastest way to make a celebration look curated and special. Seeing a child’s name, their age, or a specific milestone on every custom favor creates an emotional connection that mass-produced items can’t replicate. It transforms the event from a standard party into a unique story about the guest of honor.
Custom printables allow you to include specific inside jokes, favorite quotes, or even photos of the birthday star. This level of detail makes the decor a conversation starter. You can find a huge variety of customizable designs to spark your imagination at the Hanging with the Kiddos shop. Moving away from generic decor allows you to celebrate the individual, making the day truly unforgettable for everyone involved.
Crafting Custom Party Favors & Decor Like a Pro
Now that you’ve branded your event, it’s time to dive into our “Create” pillar. This is where the magic happens. Mastering the art of home assembly is what separates basic crafts from professional-quality DIY birthday party decorations. You don’t need a factory to get factory results; you just need a logical workflow and the right materials. Let’s walk through the transformation from digital screen to physical favor.
First, select your Printable Party Favor Templates. Start with something high-impact like custom chip bags or juice box wrappers. Once you open these in Canva, add the guest of honor’s name, age, and high-resolution photos. Using sharp, clear images is vital for that “pro” finish. When you’re ready to print, adjust your settings to “Best” or “High Quality” to ensure maximum ink saturation and vibrant colors that won’t smear. Finally, assemble your items with precision, focusing on clean folds and strong bonds.
The Essential DIY Assembly Toolkit
Your tools determine your finish. While scissors work in a pinch, a paper trimmer is non-negotiable for straight, professional-looking edges. It saves time and ensures every favor looks identical. For assembly, choose your adhesive based on the material. Double-sided tape is perfect for clean, flat seams on wrappers. Hot glue provides a stronger bond for heavy cardstock banners or cake toppers. If you really want to impress, use a paper crimper on the top and bottom of your custom chip bags. This simple tool creates that authentic, factory-sealed texture that guests will love.
Choosing the Right Paper for Professional Results
The secret to that “expensive” look is the paper quality. Using Glossy Photo Paper is essential for snack wrappers and labels. It provides a shiny, vibrant finish that makes colors pop. For items that need more structure, like cake toppers or hanging banners, reach for Premium Glossy Cardstock. It’s sturdy enough to stand upright but still offers that beautiful luster.
Always check your printer settings before hitting print. Selecting the correct paper type in your printer menu ensures the ink dries properly and stays crisp. High-quality paper is the foundation of stunning DIY birthday party decorations that guests won’t believe you made at home. It ensures your hard work in the design phase translates perfectly to the physical party space.

Executing the Big Day: Stress-Free Setup & Growth
You’ve planned with purpose and created with heart. Now we reach the “Grow” pillar of our framework. This stage is about more than just one successful event; it’s about your evolution as a creator. Many parents discover that once they master DIY birthday party decorations, they start receiving requests from friends and family. This newfound confidence can even spark the beginning of your own creative business. You’re transitioning from someone who just “throws a party” to a skilled designer who builds immersive experiences.
To keep the big day running smoothly, prepare a “Go-Box.” This is your party day survival kit. Pack it with extra double-sided tape, scissors, and a few spare favor wrappers. Having these backups on hand prevents panic if a label gets damp or a guest brings an unexpected sibling. When you arrive at your venue or start decorating your home, focus your energy on the “Main Table.” This serves as your central focal point. By concentrating your most detailed DIY birthday party decorations here, you create a high-impact backdrop for photos and a clear anchor for your theme’s branding.
Stress-Free Setup and Breakdown Strategies
Avoid the frantic last-minute rush by using the “Zone” method. Divide your party space into distinct, manageable areas for food, favors, and activities. This organizational strategy keeps the guest flow moving and prevents any single area from feeling cluttered. Don’t be afraid to enlist a “Party Assistant.” Ask a reliable friend or family member to handle small tasks, like refilling snack trays or adjusting a banner, so you can actually enjoy the celebration you worked so hard to build.
Cleanup doesn’t have to be a chore. Use stylish, coordinated disposable elements that match your theme. This allows for a quick breakdown after the party ends without sacrificing the professional look of the event. When the celebration is over, you’ll feel the satisfaction of a job well done rather than the exhaustion of a messy house.
Join the Community: The Party Printable Studio
The creative journey doesn’t have to end once the candles are blown out. Joining the Membership at the Party Printable Studio provides you with year-round inspiration for every holiday and milestone. You’ll move beyond basic designs and gain access to exclusive tutorials that take your Canva and home printing skills to a professional level. It’s a space where you can continue to refine your craft and stay ahead of the latest styling trends.
Being part of a community empowers you to keep growing. You’ll learn how to tackle more complex projects and share your own creative examples to inspire other parents. By showing what’s possible with a few digital tools and the right paper, you become a mentor in your own right. You’re not just making decorations; you’re creating a lifestyle of celebration and growth that makes every milestone feel truly extraordinary.
Start Your Creative Celebration Journey Today
You’ve discovered that creating high-end DIY birthday party decorations isn’t about having a massive budget or years of design experience. This guide has shown you how to plan, design, and execute a professional-looking event using simple tools. By focusing on a cohesive brand for your event and choosing premium materials like glossy paper, you ensure a polished finish that impresses every guest. Thousands of DIY parents have already used these methods to transform their celebrations. These professional templates are specifically designed for Canva beginners, making the process fast and enjoyable.
The path from a simple idea to a fully executed, stress-free party is now right at your fingertips. You have the roadmap, the toolkit, and the creative spark needed to succeed. Don’t let overwhelm hold you back from making magic happen for your loved ones. You’re ready to build something beautiful.
Ready to start creating? Shop our Editable Canva Party Templates today!
Every milestone is an opportunity to celebrate, create, and grow. You have the power to create meaningful, visually stunning memories for your family while building your own creative skills. We can’t wait to see what you build!
Frequently Asked Questions
How do I choose the right Canva template for my party project?
Start with the specific favor type you need, such as chip bags or juice labels. Look for templates that match your core theme or color palette. Ensure the template is fully editable in Canva so you can swap out text and photos easily. Choosing a bundle or a set of DIY birthday party decorations is often better than picking individual items because it guarantees all your elements will have a perfectly matched, professional look.
Which paper type is best for custom chip bags and candy wrappers?
Premium Glossy Paper is the best choice for these items. It provides a shiny, vibrant finish that mimics store-bought packaging. This specific paper is flexible enough to fold around treats without cracking, yet thick enough to feel high-quality. Using standard office paper often results in dull colors and a flimsy feel. Glossy paper ensures your DIY birthday party decorations look like they came from a professional print shop.
What printer settings should I use for borderless or glossy printing?
You should always select the “Best” or “High Quality” setting in your printer’s dialog box. Choose the specific paper type, such as “Glossy Photo Paper,” to ensure the printer applies the correct amount of ink. If your printer supports it, select the “Borderless” option to eliminate white margins. This allows your designs to bleed off the edge, which is essential for creating seamless wrappers and professional-looking favor bags.
How can I assemble printable party favors without making mistakes?
Practice on a plain piece of paper first to master the folds before using your final prints. Use a bone folder or a ruler to create crisp, clean creases. Always apply your adhesive to the overlap area rather than the main design to keep the front looking perfect. If you’re working with multiple favors, set up an assembly line. Doing all the folding first, then all the gluing, reduces errors and keeps your results consistent.
What are common mistakes beginners make when using Canva for parties?
Beginners often forget to check the “Bleed” and “Margin” settings before exporting their designs. Another common error is using low-resolution photos, which can look blurry when printed. Always ensure your text is within the safe zones so nothing gets cut off during assembly. Overcomplicating the design with too many different fonts can also make your work look cluttered. Stick to two or three coordinating fonts for a cleaner, more professional appearance.
Is it cheaper to print party decorations at home or buy them?
Printing at home is generally more cost-effective for small to medium parties because you only pay for the supplies you actually use. You avoid shipping fees and the premium markups of custom event planners. Beyond the savings, the real value is in the total customization. You can’t buy store-bought decor that features your child’s specific name, age, and favorite photos. It’s a budget-friendly way to create a completely unique and high-end experience.
Article by
Latoya
Latoya is the founder of Hanging with the Kiddos, where she helps DIY creators design and print professional-quality party favors at home. Through step-by-step tutorials, editable Canva templates, and the Party & Confetti line of premium printing supplies, she shares practical tips that make creating personalized celebrations easier and more enjoyable. Her mission is simple: help families, creators, and small business owners Celebrate • Create • Grow.
Disclaimer
“This post may contain affiliate links, which means if you choose to make a purchase, I may earn a small commission from purchases made at no extra cost to you. Your support is invaluable in helping me continue providing free content on this site & I really appreciate It!”