

Planning a party should be exciting—not stressful. But if you’ve ever found yourself surrounded by half-assembled chip bags, unfinished party favors, and a printer that suddenly decides to stop cooperating the night before the big event, you’re definitely not alone.
At Hanging with the Kiddos, we’ve helped thousands of DIY party creators design, print, and assemble professional-looking party decorations right from home. One thing we’ve learned is that beautiful parties don’t come together by accident—they come together with a plan.
That’s exactly what this DIY party decoration assembly guide is here to help you create.
Whether you’re planning a birthday party, baby shower, graduation, holiday celebration, or school event, having a simple step-by-step setup process can save you hours of stress while making your decorations look polished and professionally styled. From printing your first party favor to arranging the final centerpiece, every step plays an important role in creating a celebration your guests will remember.
In this guide, we’ll walk you through everything you need to know, including:
- A simple 7-day party preparation timeline
- How to print and assemble printable party favors without smudges or mistakes
- The best paper and supplies for different party projects
- Professional setup techniques that make decorating faster and easier
- Common DIY party setup mistakes (and how to avoid them)
- A stress-free cleanup strategy and printable party setup checklist
Whether you’re creating printable chip bags, candy wrappers, water bottle labels, favor boxes, cake toppers, or banners, these tips will help you work smarter—not harder—so you can spend less time worrying about decorations and more time celebrating with your family and friends.
Let’s get started!
Beginner Questions Before You Start
Diving into the world of printable party favors can feel like a big leap, but we promise it’s easier than you think! Let’s clear up a few common questions right away to build your confidence.
- Do I need a special, expensive printer? Absolutely not! Most modern home inkjet printers are perfect for the job. The real secret to professional quality isn’t the printer—it’s using the right paper and printer settings. We cover this in our Beginner’s Guide to Printing Party Favors at Home.
- What if I’m not “tech-savvy” enough for Canva? If you can use social media, you can use Canva! Our templates are designed to be incredibly user-friendly. You just click and type to edit. For a little extra guidance, check out our tutorial on How to Edit Canva Party Favor Templates.
- How do I avoid smudges on my beautiful prints? This is the most common fear, and it has a simple two-part solution: use high-quality glossy paper that’s formulated for inkjet printers, and give your prints time to "cure" (dry) before you start assembling. We’ll cover this more below!
- Will this actually save me time and money? Yes! While there’s an initial learning curve, creating a streamlined system saves you from last-minute store runs and the high cost of pre-made, customized items. Plus, you can print exactly what you need, which reduces waste.
Your 7-Day Party Setup Timeline
One of the biggest mistakes DIY party planners make is trying to finish everything the night before the celebration. While it might seem manageable at first, last-minute printing, cutting, and assembling can quickly turn an exciting event into a stressful experience.
The good news? It doesn’t have to be that way.
By spreading your party preparation over the course of a week, you’ll have plenty of time to customize your designs, print high-quality decorations, assemble your party favors, and set everything up without feeling rushed. Even if something unexpected happens—like running out of ink or making a printing mistake—you’ll have time to fix it before party day.
Follow this simple timeline to stay organized and enjoy the creative process.
7 Days Before: Design, Customize & Gather Supplies
This is your planning phase. Finalize your party theme, edit your printable templates, and make sure you have everything you need before printing begins.
During this stage, you should:
- Customize your Canva party favor templates.
- Double-check names, dates, and party details for accuracy.
- Count your guests so you know exactly how many favors to make.
- Order or purchase paper, cardstock, sticker paper, ink, and other supplies.
- Create a checklist of every decoration and party favor you’ll be making.
Pro Tip: Buy a little extra paper and ink. Having backup supplies can save the day if you need to reprint a page.
3 Days Before: Print, Cut & Prepare
Now it’s time to start production.
Print all of your decorations in batches so you can maintain consistent printer settings throughout the project. Once everything is printed, allow the ink to dry completely before handling the pages.
This is a great time to:
- Print chip bag wrappers, candy wrappers, banners, and favor boxes.
- Print water bottle and juice pouch labels.
- Trim all printed pieces using a paper trimmer or scissors.
- Organize finished pieces into separate folders or containers.
Pro Tip: Print one test page before printing your entire project. It’s much easier to fix a mistake on one sheet than twenty.
1 Day Before: Assemble & Pack Everything
With all of your pieces printed and cut, it’s time to assemble your party favors.
Work on one project at a time instead of jumping between different decorations. Completing each project before moving to the next helps you stay organized and reduces mistakes.
As you finish each item:
- Assemble favor boxes and treat holders.
- Fill chip bags and other party favors.
- Apply water bottle and juice pouch labels.
- Prepare centerpieces and cake toppers.
- Pack everything into labeled bins based on where it will be used during setup.
For example:
- Food Table
- Dessert Table
- Gift Table
- Photo Booth
- Welcome Table
Having everything organized by location makes decorating much faster on party day.
Party Day: Decorate, Style & Celebrate
Today is the fun part!
Because you’ve already completed the hard work, your focus is simply bringing everything together.
Start with larger decorations like backdrops and banners before arranging your tables. Once the main decorations are in place, add your party favors, centerpieces, desserts, and finishing touches.
A simple setup order looks like this:
- Hang backdrops and banners.
- Arrange tables and large decorations.
- Place centerpieces and cake displays.
- Add printable party favors and treats.
- Apply final styling touches.
- Take photos before guests arrive!
Most importantly, don’t forget to pause and enjoy what you’ve created. Your guests will notice the thoughtful details, and you’ll be able to celebrate without worrying about unfinished projects.
Optimize Your Home Printing Workflow
One of the biggest factors in how your printable party decorations turn out is the paper you choose. Even the most beautiful design can lose its impact if it’s printed on the wrong material.
Before printing, think about what you’re creating. Wrappers, labels, favor boxes, and banners all have different needs, and choosing the right paper for each project will give you better color, cleaner folds, and a more professional finish.
For printable party favors like chip bags, candy wrappers, popcorn bags, and treat wrappers, we recommend **Party & Confetti Premium Glossy Paper **. It’s designed to produce vibrant colors, folds beautifully, and works well with home inkjet printers.
For water bottle labels and juice pouch labels, **Party & Confetti Glossy Sticker Paper ** provides a smooth finish with an adhesive backing that makes labels quick and easy to apply.
The right paper won’t just improve how your decorations look—it can also make assembling your party favors much easier.
Printer Settings Checklist
Before printing your full project, double-check these printer settings:
✔ Paper Type: Choose the setting that most closely matches your paper, such as Glossy Photo Paper.
✔ Print Quality: Select High or Best quality for the sharpest text and most vibrant colors.
✔ Borderless Printing: Turn this on when printing full-page designs like chip bags to eliminate unwanted white borders.
✔ Print a Test Page: Before printing your entire project, print one page to check colors, sizing, and alignment.
Taking a minute to review these settings can help reduce wasted paper, save ink, and prevent reprinting.
Instant-Dry Printing Tip
One question we hear all the time is, "How long do I need to let my prints dry?"
The answer depends on the paper you’re using.
If you’re printing on **Party & Confetti Premium Glossy Paper **, your prints are designed to dry almost instantly. We still recommend giving them a few seconds before stacking or handling them, just to ensure the ink has fully set.
If you’re using another glossy paper, be sure to follow the manufacturer’s drying recommendations, as some papers may require additional time before cutting or assembling.
Before You Start Cutting
Before you reach for your scissors or paper trimmer, take a quick look through your printed pages.
Use this final checklist:
- □ Colors look bright and accurate.
- □ Text is sharp and easy to read.
- □ Names, dates, and spelling are correct.
- □ Borders printed correctly.
- □ No printer streaks or smudges.
- □ You printed enough copies for every guest (plus a few extras).
Spending just a minute checking your prints now can save you from having to reprint an entire project later.
Helpful Tip: Print everything first, complete your quality check, and then move on to cutting and assembling. Working in batches helps you stay organized and creates a smoother, less stressful workflow.
Best Paper and Supplies for Different Party Projects
One of the easiest ways to improve the look of your DIY party decorations is to use the right paper for each project. Different party favors have different needs, and choosing the correct paper can make a noticeable difference in print quality, durability, and how easy your decorations are to assemble.
For example, a printable chip bag needs paper that folds cleanly while producing vibrant colors, while a water bottle label needs an adhesive paper that stays in place throughout your celebration. Using the right material from the beginning helps your finished decorations look more polished and can save you time during assembly.
The guide below will help you choose the best paper for some of the most popular printable party projects.
| Party Project | Recommended Paper | Why It Works |
|---|---|---|
| Chip Bags | Party & Confetti Premium Glossy Paper | Produces vibrant colors, folds cleanly, and features an instant-dry finish that’s perfect for printable chip bags. |
| Candy Bar Wrappers | Party & Confetti Premium Glossy Paper | Gives wrappers a smooth, glossy finish while keeping colors bright and professional. |
| Rice Krispie Treat Wrappers | Party & Confetti Premium Glossy Paper | Flexible enough to wrap treats while creating crisp, vibrant prints. |
| Popcorn Bags & Treat Bag Wrappers | Party & Confetti Premium Glossy Paper | Lightweight, easy to fold, and ideal for colorful party favors. |
| Water Bottle Labels | Party & Confetti Glossy Sticker Paper | Easy peel-and-stick application with a smooth finish that looks professionally printed. |
| Juice Pouch Labels | Party & Confetti Glossy Sticker Paper | Designed to create vibrant labels that apply quickly and stay in place during your party. |
| Favor Boxes & Cake Toppers | Heavy Glossy Cardstock | Provides extra support for projects that need to stand upright or hold their shape. |
| Banners & Party Signs | Glossy or Matte Cardstock | Durable enough for hanging decorations while helping prevent curling around the edges. |
More Than Just Paper
Great DIY party decorations aren’t just about what you print on—they’re also about having the right tools nearby. A few quality supplies can make cutting, folding, and assembling your party favors faster, easier, and more enjoyable.
Some of our favorite essentials include:
- A paper trimmer for clean, straight cuts
- Sharp precision scissors
- Double-sided tape for chip bags and wrappers
- Glue dots for lightweight embellishments
- A bone folder for crisp folds on favor boxes
- A scoring tool for clean fold lines on cardstock projects
Having these supplies ready before you begin helps create a smoother workflow and gives your finished decorations a more polished, professional appearance.
Helpful Tip: If you’re creating several different printable party favors for the same celebration, try using the same paper finish throughout your projects. Matching finishes help create a cohesive party display and give your decorations a professionally coordinated look.

Pack Your DIY Party Setup Go-Bag
One of the easiest ways to reduce stress on party day is to have all of your tools in one place. Whether you’re decorating at home or setting up at a venue, a well-stocked "Go-Bag" means you won’t have to stop and search for scissors, tape, or other supplies when you’re in the middle of decorating.
Keep everything together in a small tote, toolbox, or storage bin so you’re ready for both setup and any last-minute fixes.
Your Go-Bag Must-Haves
Adhesives
Different projects call for different adhesives, so it’s helpful to have a few options on hand.
- Double-sided tape for chip bags and wrappers
- Glue dots for small embellishments and lightweight decorations
- Hot glue gun (optional) for heavier decorations or centerpieces
Cutting Tools
Clean cuts make a big difference in how your finished party favors look.
- Sharp precision scissors
- Paper trimmer for straight, professional cuts
- Craft knife and self-healing cutting mat (optional)
Hanging Supplies
Make decorating easier with a few simple hanging tools.
- Command™ Hooks or removable adhesive strips
- Clear fishing line
- Clear tape
- Painter’s tape for temporary positioning
Assembly Tools
A few specialty tools can make assembling printable party favors faster and give them a more polished finish.
- Bone folder for crisp folds on favor boxes and treat bags
- Small ruler for scoring and measuring
- Tweezers for placing small embellishments (optional)
Quick Repair Kit
Even with the best planning, little mishaps can happen. Keeping a few extra supplies nearby makes quick fixes easy.
- Extra double-sided tape
- Glue dots
- Black marker for touching up small scuffs
- A few extra printed party favors or labels
Helpful Tip: If you’re creating multiple party favors, assemble one complete sample first. This lets you double-check sizing, folds, and adhesives before putting together the rest of your project.
The Day-Of Party Setup Guide
It’s party day! Because you did all your prep work, this phase is all about placement and styling. Your bins are packed and labeled, your favors are assembled, and your timeline is clear. Now you get to be the artist.
The ‘Top-Down’ Rule for Efficient Setup
Always, always, always start from the top and work your way down. This means hanging your backdrops, wall banners, and any ceiling decor first. Why? Because if you set up your delicate cake stand and perfectly arranged favors on the table first, you risk knocking everything over while stretching to hang a banner above it. Work smart, not hard!
- Hang Backdrops & Banners: Get these major visual elements in place. This defines your party zones.
- Position Anchor Pieces: Place your main focal points on the table, like the cake stand or a large floral arrangement. Everything else will be built around these.
- Arrange Favors & Food: Now, fill in the table with your beautifully assembled printable party favors and platters. Use the "Rule of Three" by grouping items in odd numbers (3, 5, 7) for a look that’s visually appealing and dynamic.
- Final Styling: Add the final touches. This is where you can create height by placing sturdy boxes or crates under your tablecloth to elevate certain dishes or decor items.
Securing Decor in High-Traffic Areas
The last thing you want is for your perfectly crafted banner to sag or fall mid-party. For heavy cardstock banners, stringing them is only half the battle. To prevent sagging, use a small, clear Command hook in the center of the banner (behind it) to provide extra support. For outdoor parties, use small, discreet weights (like fishing weights or decorative stones) tied to the bottom corners of banners to keep them from flying away in the wind.
Common DIY Party Setup Mistakes (and How to Avoid Them)
We all make mistakes, but learning from them is key. Here are a few common pitfalls I see DIYers fall into, so you can sidestep them completely.
- Mistake #1: Not Doing a ‘Dry Fit.’ You’ve designed a gorgeous tablescape in your head, but when you set it up, you realize the cake stand is too big and there’s no room for the favors. The Fix: A week before, use painter’s tape on your floor to mark out the dimensions of your party table. Arrange your (empty) platters, stands, and a few sample favors to ensure everything fits comfortably.
- Mistake #2: Forgetting About Lighting. You set up a stunning photo booth, but the photos all come out dark and grainy because it’s in a poorly lit corner. The Fix: As you plan your layout, consider your light sources. Position key areas like the food table and photo op near windows or in well-lit parts of the room. If needed, bring in an extra lamp or a simple ring light.
- Mistake #3: Transporting Decorations Unprotected. You spend hours on a delicate cardstock cake topper, only to have it bend and crease in the car on the way to the venue. The Fix: Transport your decorations in shallow boxes or on flat trays. For delicate items like cake toppers and centerpieces, lay them flat on a piece of cardboard to keep them from getting crushed.
The Strategic Party Breakdown and Cleanup
The guests have gone home, and you’re left with the aftermath. The dread of cleanup is real, but with a smart strategy, you can be relaxing on the couch in 30 minutes or less.
The ‘Empty Bin’ Strategy
The secret to a fast cleanup is having a plan before the party even ends. Before your first guest arrives, have three empty, clearly labeled bins ready to go:
- KEEP: For non-perishable, reusable decorations like banners, cake stands, and high-quality cardstock centerpieces.
- TRASH: For used paper plates, napkins, food waste, and broken items.
- DONATE / GIVE AWAY: For extra, unopened favors or decorations you don’t plan to keep.
As you clear the space, you can sort items directly into the correct bin. This eliminates the need to make dozens of small decisions when you’re tired. First, tackle the perishables—get all food cleared and put away. Then, work your way through the decor, sorting as you go.
What to Save vs. What to Recycle
One of the best parts of DIY is the ability to reuse your creations! Generic banners ("Happy Birthday"), table runners, and sturdy centerpieces can often be used again. To store your cardstock items, lay them flat between two pieces of cardboard and slide them into a large Ziploc bag. This prevents bending, fading, and moisture damage.
Before you toss everything else, take a moment to document your work. Snap a few "breakdown photos" of your setup. This will be an invaluable reference for your next party, reminding you of what worked beautifully and what you might change next time.
Quick Printable Party Setup Checklist
You’ve made it to the final step! By following this DIY party decoration assembly guide, you’ve planned your timeline, printed your decorations, assembled your party favors, and prepared for party day.
Before you start celebrating, take one last look through this quick checklist to make sure everything is ready. Save it to Pinterest, print it for future parties, or keep it open on your phone while you decorate.
Use the infographic below as your printable party setup checklist.
✔ Finalize your guest count
✔ Customize and download your party templates
✔ Print a test page
✔ Print all party decorations
✔ Cut and assemble your party favors
✔ Pack your DIY Party Setup Go-Bag
✔ Organize decorations by party zone
✔ Set up larger decorations first
✔ Add party favors and finishing touches
✔ Take photos before your guests arrive
**
**
**
**
Celebrate Your Hard Work
Creating your own party decorations takes a little planning, but the results are worth it. With the right timeline, quality supplies, and a simple assembly process, you can create a celebration that’s both beautiful and memorable.
Remember, your guests won’t notice every tiny detail—they’ll remember the fun, the laughter, and the thought you put into making the day special.
Whether you’re creating printable chip bags, water bottle labels, candy wrappers, favor boxes, or banners, we hope this DIY party decoration assembly guide gives you the confidence to celebrate, create, and enjoy the process from start to finish.
**
**
If you’re looking for more party inspiration, printable templates, tutorials, and premium printing supplies, explore everything we offer at Hanging with the Kiddos. We’re here to help you Celebrate • Create •Grow with every celebration.
Article by
Latoya
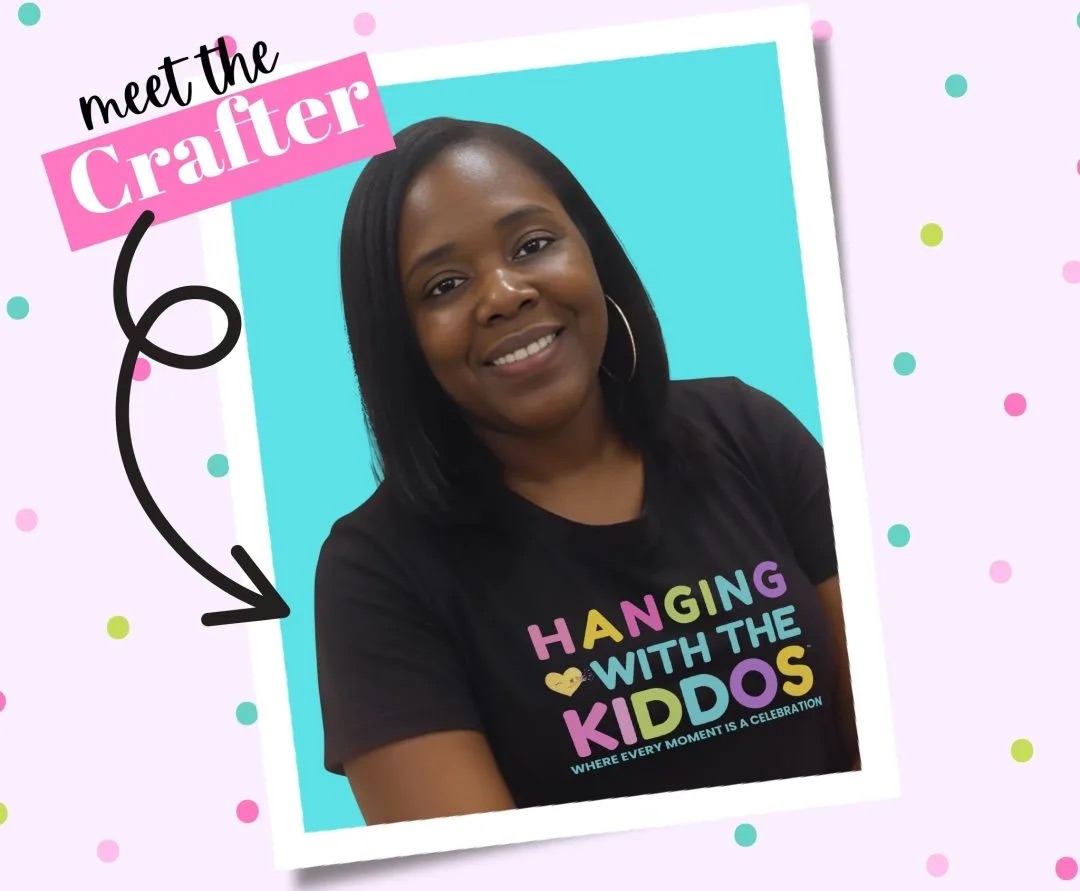
Latoya is the founder of Hanging with the Kiddos, where she helps DIY creators design and print professional-quality party favors at home. Through step-by-step tutorials, editable Canva templates, and the Party & Confetti line of premium printing supplies, she shares practical tips that make creating personalized celebrations easier and more enjoyable. Her mission is simple: help families, creators, and small business owners Celebrate • Create • Grow.
Disclaimer
“This post may contain affiliate links, which means if you choose to make a purchase, I may earn a small commission from purchases made at no extra cost to you. Your support is invaluable in helping me continue providing free content on this site & I really appreciate It!”


